Bleed and Crop Marks
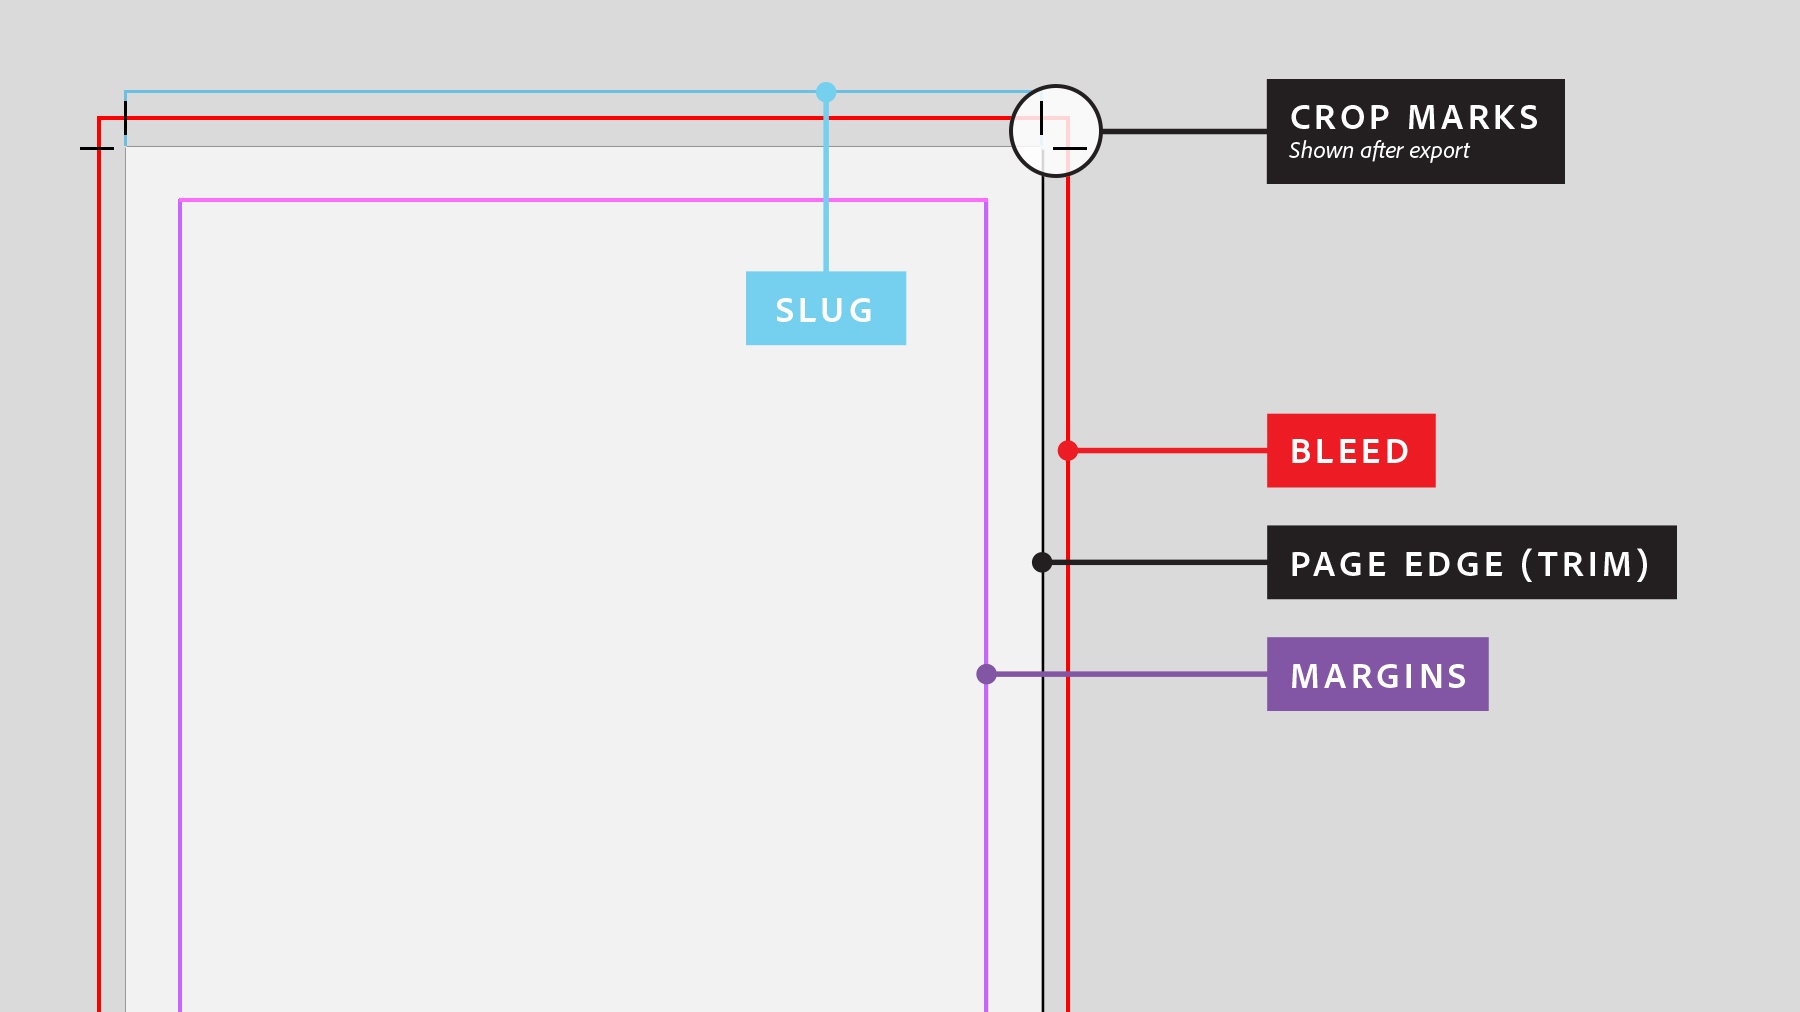
When supplying artwork to commercial printers most, if not all, will request that your artwork is submitted with crop and bleeds. Why? well this is a prerequisite for printing images and background colours right to the edge of paper. Without this, you risk your order being received with white borders, which doesn’t always look great. Lets help you avoid this by setting up your artwork with bleeds and crop marks.

Setting up bleeds when you create your document
We recommend setting up your bleed area from the get go to save you time and effort adjusting your document when exporting and sending your file for print.
Please follow the steps below
(Steps below are specific to In-Design but a similar process is used for Illustrator or Quark)
- Click > “Create New”
- Select > “Print” tab at the top
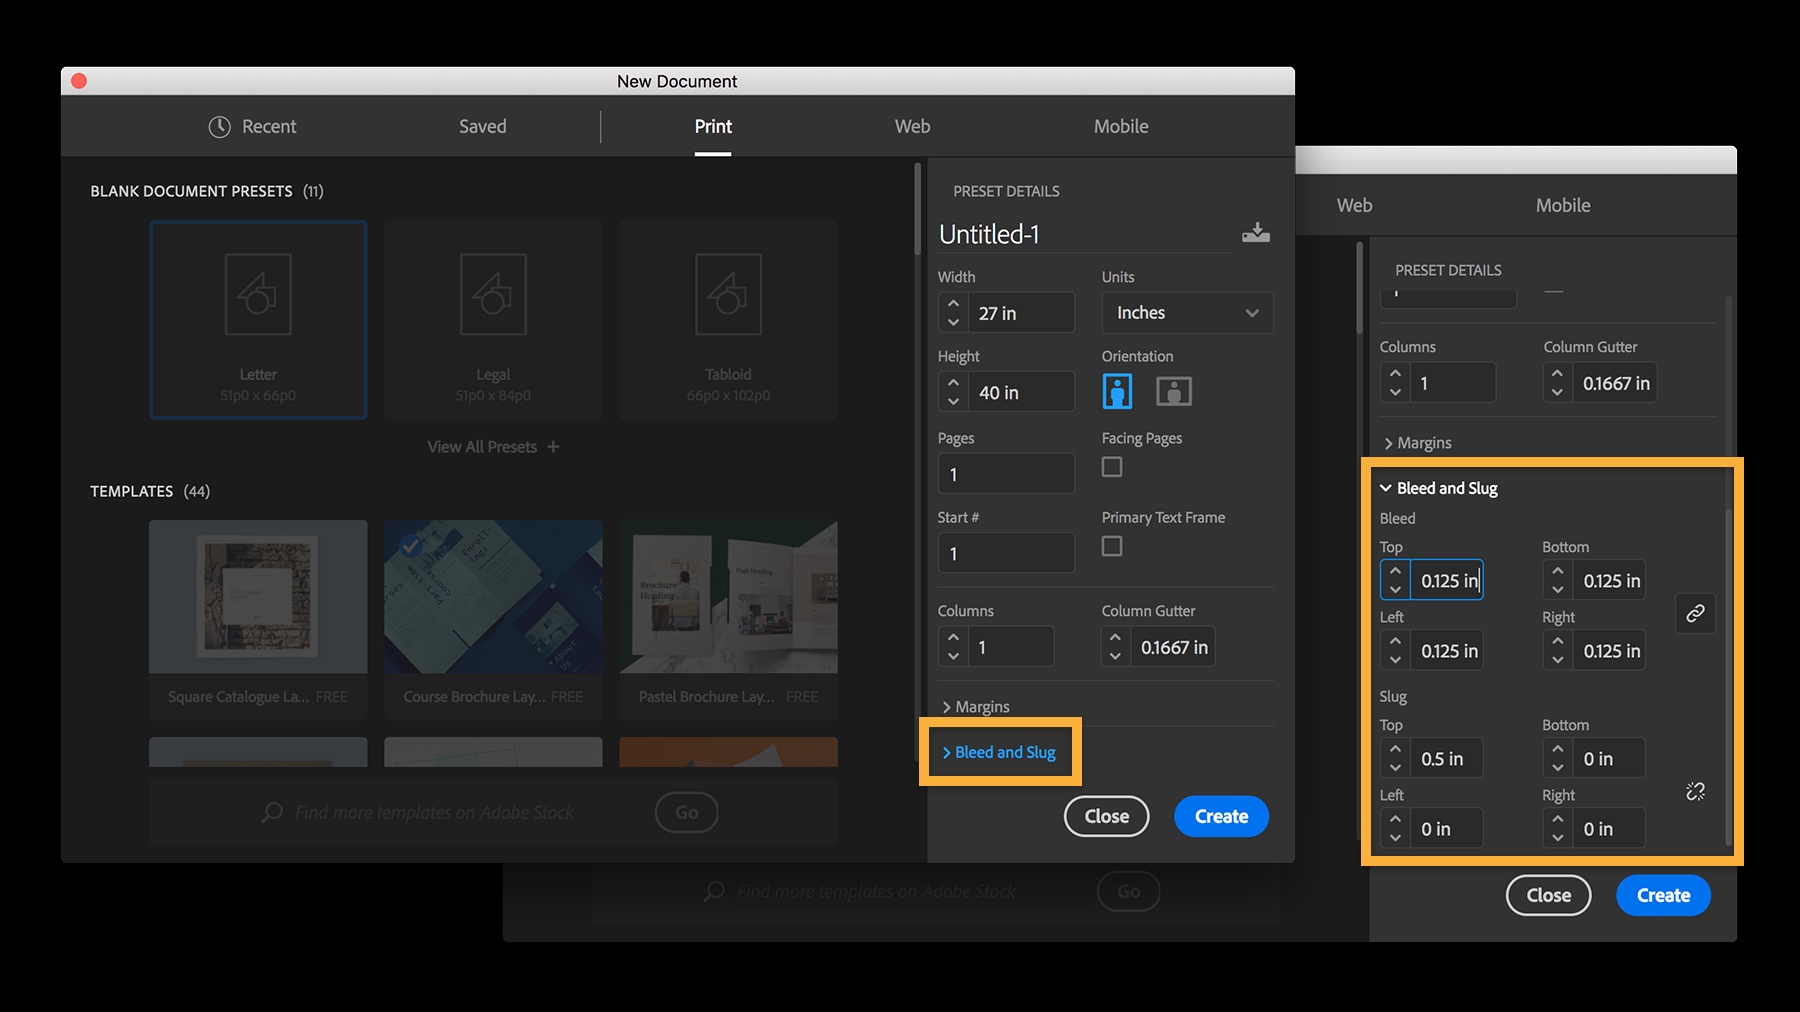
- Set-Up > “Preset Details” select your preferred measurement units & type in your document or finish size.
- Go To > “Bleed and Slug”
- > Expand this panel and type in a bleed value in any units
- > We require your document to set-up with a 3 mm “bleed”, which is 0.125 in
- Click > Create

Align your artwork to the bleed guides
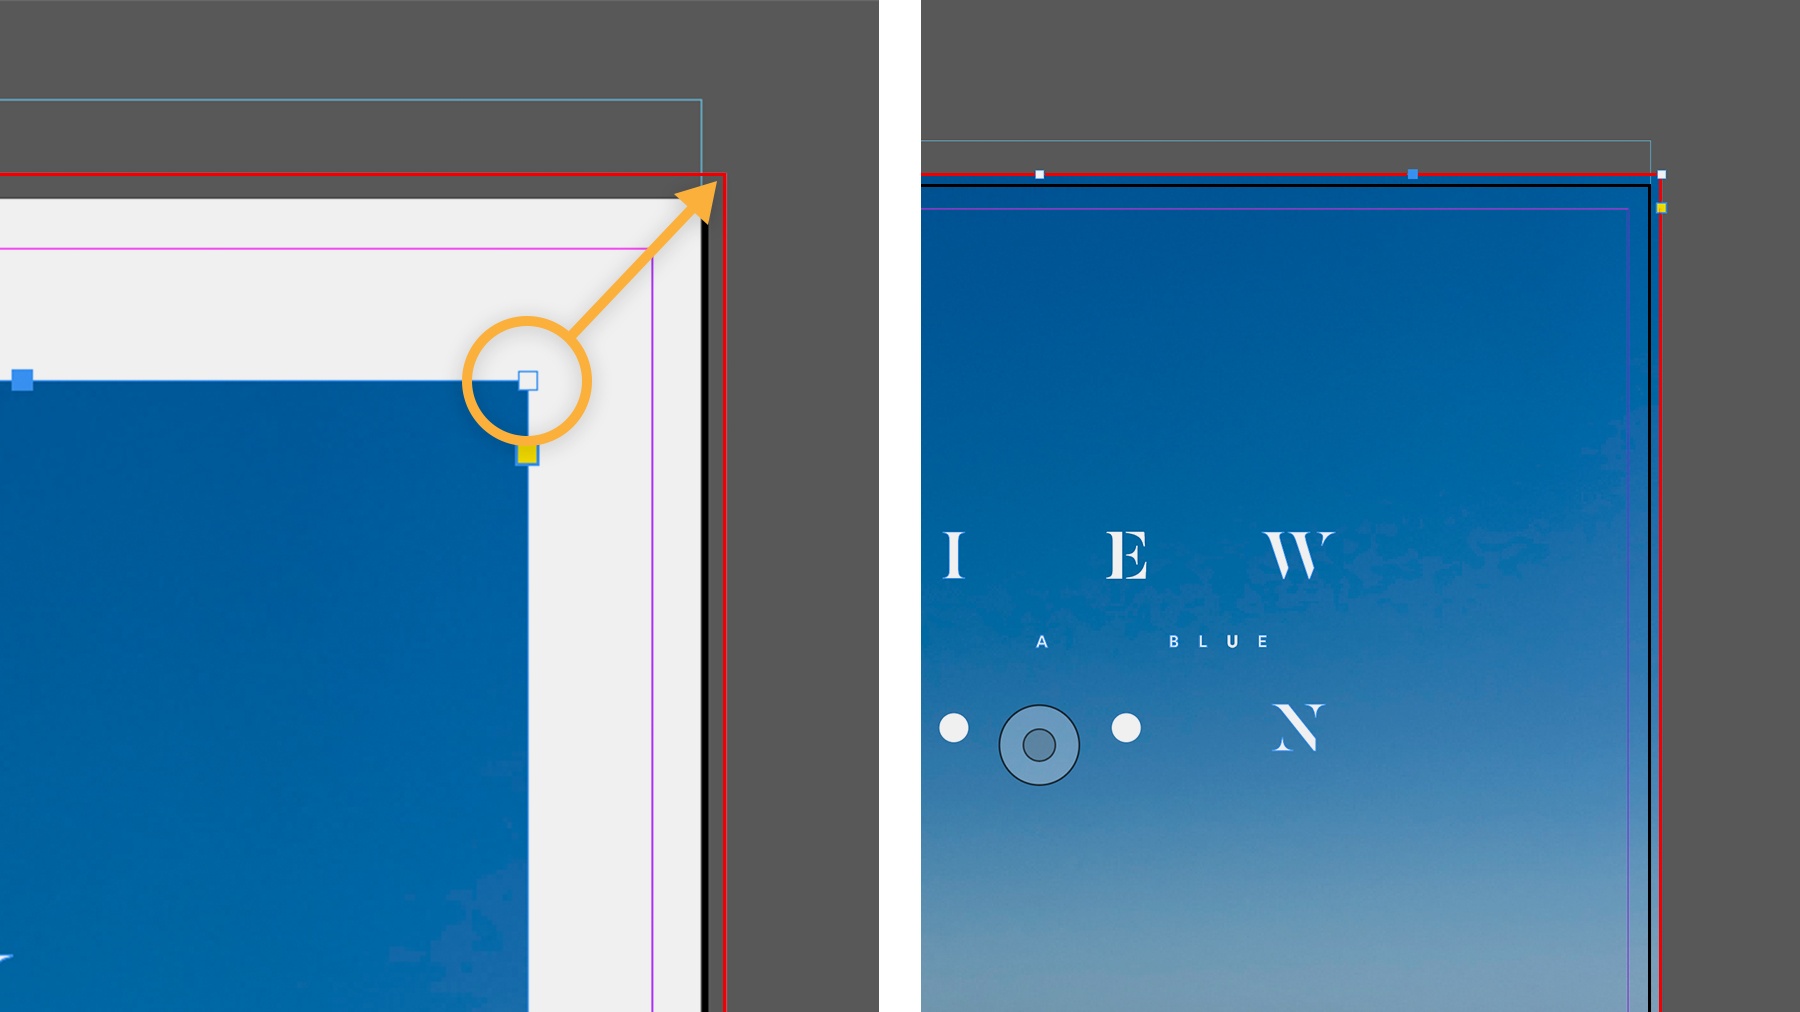
- Place your artwork on the page and position it so its edges align with the bleed guides.
- Objects should snap easily to the guides, so you can be assured your artwork will print correctly.

Setting up bleeds when you create your document
We recommend setting up your bleed area from the get go to save you time and effort adjusting your document when exporting and sending your file for print.
Please follow the steps below
(Steps below are specific to In-Design but a similar process is used for Illustrator or Quark)
- Click > “Create New”
- Select > “Print” tab at the top
- Set-Up > “Preset Details” select your preferred measurement units & type in your document or finish size.
- Go To > “Bleed and Slug”
- > Expand this panel and type in a bleed value in any units
- > We require your document to set-up with a 3 mm “bleed”, which is 0.125 in
- Click > Create

Create a PDF that includes bleeds
Are you ready to go? great, please export your document as a PDF file with your bleed and slug details. Follow the steps below to ensure this information is captured:
- Go To > “File”
- Click > “Export”
- Select > “Adobe PDF (Print)” Name your document and click “Save’
- Section > “Adobe PDF Preset” click “Press Quality”
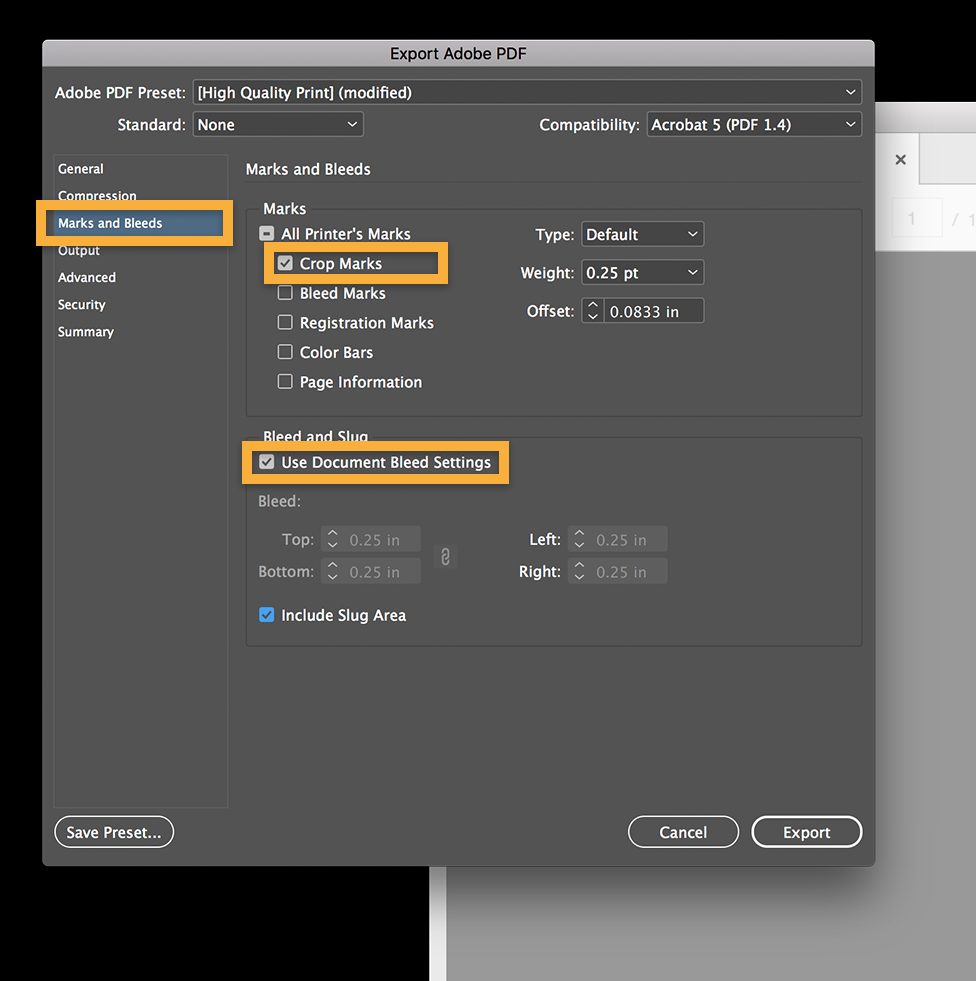
- Go To > “Marks and Bleeds”
- Tick > “Crop Marks”
- Tick > “Use Document Bleed Settings”
- Click > “Export”
The file should now be ready for print, please open the file to ensure that the bleed area and crop marks are visible and you are good to go, happy printing…

